Monday, August 9, 2010

working with what you have . . .

My dad was full of ideas and built all sorts of gadgets for himself to do his work. He was a machinist and worked with his hands all his life, and he came up with some REALLY useful ingenious devices. One creative idea that I learned from my dad was this dust-blowing tube that keeps your work clean while you work. Since I use the scroll saw tons, I needed something that would blow the dust away while I worked so I could see the pencil lines on the project I was working on. After years of blowing it off with a puff of breath (and nearly passing out) I rigged up a tube that is attached to the arm of the saw using a wire. Under the saw is a bulb syringe, attached to the tube, and being pumped from the movement of the arm. The result is the small puff of air that seems like a continuous stream to blow the dust off.


While I am at it, I'll share some more of the creative ways I am using some of the materials that I have found around the farm to a good purpose. First, there are my upcycled fencing that I am using as tomato cages. Out in the woods I have a metal/concrete graveyard. We call it the graveyard because all this junk/material was just put there to die. Anyway, I started to visit the graveyard and see if I could re-purpose some of the materials to a better use. Once old and dying, now new and usable. Ildi needed 80 cages made so I decided to use the rusted rolled up fencing to make them. I had originally thought to make them vertically, but then got inspired to try to work with their natural bend. They have sat in the woods for years rolled up. Here I cut them in the middle of the 13th and 14th square making sure to leave some wire to push in the ground. They naturally drape over the plant and have enough space for the plant to grow UP THROUGH the holes creating support for the blossoming plant. I am thinking that I might have to add a larger cage on top if the plants gets much taller. I have enough fencing to last a lifetime!


And these are my upcycled blocks of concrete turned garden markers. We have four paddocks of garden so I put 16 pieces, one on each corner, to mark out where the garden starts and ends. It also makes a nice border for mowing the grass next to the first rows.


I found some flat blocks and decided to make a patio of sorts outside my wood shop door. The step over the doorway was a little high so I put some sand down, added the concrete pieces as pavers, and then brushed sand between them much like you would do for a brick patio. I am in process of making the same thing on the back of the house for a patio. My goal is to let the grass grow up between them to give it all a cottage design look and feel.

Using the same kinds of blocks, the family has been enjoying some outside fire pit cooking as well. A few months ago I built the pit using the concrete, and lined the inside with really small stones. The blocks are movable so if I decide I want the fire pit elsewhere, I just move the pieces to the new site.

And lastly is our skid recycle bin. One skid on the bottom, four around the sides to create a great place to put scraps of plants, manure, and the occasional dead chicken or groundhog. On top I have my compost sifter that fits over top of my wheel barrel. I just heap a bunch of compost on it, shake it down, and then return the larger pieces for more decomposing time.

Saturday, August 7, 2010

cut way down . . .

This is what the finished plucker looks like in action. And it WORKS! It was one of those things that was either going to work really well, or not at all. I am sure glad is was the former. And all of us are glad that the whole plucking time has been cut WAY down. The last time we butchered, the plucking of the birds was the most time consuming, and the most dreaded work of processing. Today, all of us stood around to watch the first bird lose it's feathers, and cheered! The whole bird was plucked in less than thirty seconds. That is one half of one minute . . . not ten minutes per bird.

And this is how squeaky clean the bird gets in a thirty second spin on the ClayBoss pottery wheel turned plucker. (although it gets altered a bit to pluck birds, it still functions as a pottery wheel)

Notice the happy young man carrying it in the screened-in room for the rest of the processing. Speaking of processes, it usually took us about three to four hours to finish 30 birds with me doing another three to four hours cleaning up the pin feathers and the "after" mess. Today, the first fifteen birds took us an hour and a half while we were getting used to another system of working together. After a short break, we grappled the other 14 birds in 45 minute! And that is with me doing NO MORE work inside. Talk about another happy man. :)

Wednesday, August 4, 2010

the latest projects . . .

I love making art and appreciating the art that others make. One of those such artists is Rodney White, a creative man who's work I LOVE! His modern day inspirational paintings inspired me to create an inspirational painting of my own on my wood shop door. He does work reminiscent of the early 1900's works that were painted to advertise products of the day.

My wood shop, which is attached to the garage, has been the latest project of mine to get into order since we moved here. The room is a 15 x 20 area that has some old wheel and pulley systems (still in tact) that was used back in the thirties when the man who owned the farm did blacksmith work. I decided that it was going to become my workshop where I make all my wood products. Here I painted my Etsy slogan "Make Something Creative" on the door to the outside in a 20's poster style like Rodney does his work. This being the first of hopefully many creative doors to come in my home. I am thinking of painting all the doors in my basement in this style as well.


And speaking of making something creative, here is the next to last step of my HOMEMADE Chicken Plucker. The last butchering session reminded me that I did not want to spend hours plucking the feathers off of the thirty birds we butcher at a time. It got me thinking. Thinking I certainly didn't want to spend $600 to $1000 for a chicken plucker! In the morning after milking I have gotten in the bad habit of leisurely lying around in my big chair. Consequently, it has been a perfect productive think time for me and where I came across the idea to use some of the materials I already had to make a plucker of my own. This one, which I am not finished with yet and don't know if it will actually work, started off with my Clay brand potter's wheel and a plastic barrel my farmer friend gave me. I cut the top off the 55 gallon barrel and then manipulated it by cutting and getting the wheel to fit into the barrel without cutting too much of it away. This was the result. The lid is one I cut off a 35 gallon barrel earlier. I drilled two holes to attach it to the wheel, and my next step is to drill 3/4 inch holes to attach the KENT C25 fingers I bought from Herrick over at The Deliberate Agrarian. If I can get it done in the next day or two, it looks like a Friday night butchering time. :)

I thought I would also show you a little more of my finished wood workshop. This is the view toward the back of the space. Today Nolan did most of the work in assembling our new table saw. I say ours because two of my boys are old enough now to use power tools like this MasterForce Professional Grade 10 inch table saw. For years I have used other's saws, or just used a Skil saw with horses and a yardstick to do the work of a table saw. It was high time to get one of my own. And since my Etsy business has sky rocketed this summer, I decided to get a nice one that I could use and then hand down to my boys.

On an earlier post I mentioned that I like to burn things. Here's a picture Nolan captured of me on another one of my fun burns. I had quite a bit of old rotted wood that I had been piling up and added some of the MILLIONS of teasel weeds that we have here on our pastures. In addition, we added some of the weeds we've been pulling from the garden. It made a beautiful white smoke that wisped through the woods. You can notice me sitting in the hot sun only a few feet away from the pile enjoying the heat of it. Also in the picture you can see Macy's finished hip roof chicken mobile, and Nolan's finished chicken house in the back.

My discussion with Ben on how I want him to repair the fascia board on the south side of the Big Barn.

The Big Barn east facing roof almost complete.

The finished work . . . No more leaks! Years ago I never thought I would be happy to pay to have a roof put on a barn. But, this project has actually made me happy to invest in. The whole Ohio Bicentennial barn project is a part of Ohio history, and I am glad to now be part of the heritage of this historical time in Ohio's past. She's a beautiful barn!

Friday, July 23, 2010

heat and work . . .


The heat is on and the work on the barn has begun! WOW is it hot up there. It is currently 95 with the heat index of 100-105 today. And the wind is blowing as well. Feels like a day described in a story book.

On Wednesday a crew of four Amish men came to roof one section of my barn with steel. The back side if this part was done a few years ago, and it definitely time to do this side. Each time it rains, the water leaks through the hip point (that the area of the roof that angles down steeper), pours in to the loft damaging the floor, and continues to leak through to the ground floor. If I chose not to get it fixed, in a few short years, that part of the barn would easily be destroyed. The barn has stood for almost 80 years now, and under my care, I don't want to lose this part of American history.


This is Ben scaling along while he adds another 2 x 4 x 16 to the roof. They attached wood to the existing roof and then screw the metal roof to the new slats. Notice that he is almost standing straight up and down. That's because he is on almost a 25 degree slope. Here he is almost 40 feet in the air.


Another exciting barn update came about this week as well. Scott Hagan, the barn artist who originally painted the Ohio Bicentennial logo on 100 of Ohio barns (mine included) came by on his way through to Indiana and stayed for a day. I had contacted him wanting to know what kind of paint he used so I could touch up the red that had faded over the years. Since he was staying for the day, I just had him do the work instead. After 10 + years, the white,blue and black still looked fine, but I had him touch up the three areas that took some red paint. Being an artist myself, I felt the need to have him change the original red he painted to a darker hue that matches the barn. He wasn't offended, and did an EXCELLENT job. If you want a painting on your barn you can contacting him through his website the barnartist.com

Saturday, July 17, 2010

the beauty of God's creation . . .

We are almost at the finish line with Macy's Hip Roof Chicken Barn building project. It has taken us a few days for a couple of reasons. One, we ran out of wood and needed to make it to town to get more 1 x 2's. Second, we are sort of building this one "off the cuff!" Macy had told me what she wanted, but it was a little bit of work to get the idea she had in her head, out to a physical house for her birds. It's a 3 x 4 foot barn for three birds and will have two roosts as well as two nesting boxes that are accessible from the rear of the movable structure. She will be moving them daily, like we do with all the birds on our farm, to get fresh grass to forage in. Tonight we finished the building part, put wire on, put roosts in, and a couple of burlap privacy curtains for the girls to do their work behind. overall, it is a lightweight, sturdy, functional house for the birds. I just might build a few of these to sell down the line.

A few night ago, and tonight, we have had some INTERESTING night skies. A double rainbow that stretched over MILES . . . and tonight this absolutely stunning sun illuminated cloud formation at the Big Pasture tree tops. We looked out of the garage (as we were building the chicken barn) to see this magnificent sight.

Tuesday, July 13, 2010

the mini chalkboard craze . . .


My whole Etsy mini chalkboard business is having a BLOW OUT summer. It's hard to believe that I have made and shipped well over 200 of them just in the last month! Here's an example of how an event coordinator used them at a bridal shower she planned last week. It seems that the boards are a big hit at both weddings and showers. Here's a link to a wedding planners site that started this whole mini-chalkboard phenomenon.

Kelley, the bride to be, and I worked together to come up with this idea for her wedding. She said she wanted chalkboards for seating name cards and wanted me to come up with a way for them to sit "propped up." I made a couple of mock boards for her to decide on and the final result was this 3 x 4 inch mini chalkboard with a post that props it up. I ended up making 70 of them for her wedding in San Francisco. All that happened over a year ago. Since I knew I could make more, I decided to use the images I took of them and re-list it in my Etsy store. That my friends, is the beginning of the chalkboard CRAZE. Since that time, I have probably sold over 500 of them. And it seems that most of the people that order them live in San Francisco! :)

I have streamlined my production of them to make it quicker to mass produce them. Just the other day I bought a belt sander that is cutting my work time sanding them in half. My next plan is to by a nice table saw that will help me make them more exact when I cut.

Thursday, July 8, 2010

new addition . . .


Here are NINE of the TEN little puppies that frolic all over our property now. Floppy, our Black and Tan Coonhound, had her Collie mix puppies about four weeks ago. They will be ready for a new home August 1st.

Saturday, June 26, 2010

fun with friends . . .


I finished the table the other day ready for THIS session of butchering. I added quite a few items to it, and after yesterday's work, have already made some changes in how we will use it.

First off, I stained it the same as the killing cones to create a unified butchering set. I love when things are functional, yet aesthetic as well. The oil from the stain also helps to repel the water when spraying. In addition to the stain, I added aluminum to the work area. I used flashing that is normally used for roofing. I bought a 10 foot roll for $12.00, cut it to fit the feathering and cleaning area of the table, and have heeps of it to use for another farm project. Some plumbing parts, an area to hang the hose, a table, some chairs, a fan, and a screened-in room made this butchering session seem like a HOTEL STAY compared to last year. All in all, I am REALLY pleased with how it turned out, but more importantly how it functioned for us. (I do have to make a few minor adjustments and it will be even smoother for the next thirty we process in five more weeks)

In addition to having a new table to work with, we also had some help this time processing our birds. The Weita family, longtime friends from our California days, came up from Florida to visit us for a few days on their way over to Illinois. They came in Tuesday night and stayed till this morning. It was great to spend time together again extending our friendship, having the children get re-acquainted after five years, and sharing some memorable experiences together. We had great food, stayed up WAY too late talking, and had fun doing all sorts of farm activities.


Tuesday, June 22, 2010

drawing out the design . . .

Butchering season is upon us now so I had to come up with another plan for dressing out the 100 or so birds that we will have. Hence, the NEW Butchering Station!

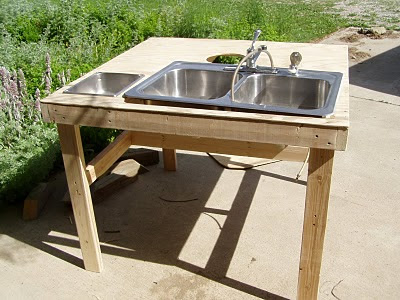
For weeks I have been looking for stainless steel sinks, counters, and tables on Craigslist and have decided that I do not want to spend $150 to $300 on a used bakery counter or a restaurant sink. I found a stainless steel sink for $20 though, and thought that was right up my alley. I had been thinking about building a table but was unsure of what I wanted, materials to use, and the sorts. This is the result (the beginning stage) of sitting down after morning milking, drinking coffee, half sleeping, and planning out the table.

The plan for the table started with several ideas in mind.

1. All of us needed to be close together able to hand birds to each other without walking around. It also had to be a condensed square footage to fit into our camping screened-in room. (we learned last year that it was hard to keep the animals away from all the excitement)

2. It needed to include several areas for working . . . sink for evisceration ans cleaning birds, counter space for plucking, area for cutting, containers for feathers and unwanted bird parts, and drainage.

3. And most importantly, aesthetic functionality.

During my sleep/plan/lazy morning routine, I drew out a design several times, and then asked the children to look at it and give me input. Each one came up with a minor change that altered the design a bit, but functioned well with the overall plan of the Butchering Station.

It took me a 1/2 day to build, and the other 1/2 day to stain, seal, and apply the finishing touches.

Friday, June 4, 2010

getting the garden game going . . .

Today is the FIRST day of summer break for me. What a different year this has been. I enjoyed the school year, we bought this farm, and we bought a car. Tons of changes going on all at once. And I love it!


First off, a couple of weeks ago some friends planned a move out of state, and needed to sell their car. Ildi and I decided that it would not only help them out, but help us out on my gas spending commute to school. As a result, we bought this 99 Saturn, pictured above, with a WHOLE BUNCH OF MILES on it. :) Works out great so far in that I have saved $60. in just two weeks.

Gresham has started in the building process of our farm. He is being such a great help in many ways. This past week he helped Nolan building a new movable chicken structure for the upcoming egg production business. 40 new laying hens will be arriving next week some time. It is really sweet to see Nolan working with his younger brother having him help the way he did with me when he was that age.


I have come up with some really creative ways to use the unwanted hay that is littering our fields. The busted beef operation that was going on before we bought this place left TONS of unusably large mounds of hay on much of the open pasture. This past week it dawned on me that I could re-purpose it and use it like much like mulch for areas where I don't want the grass to grow. Like this path I cut through a spot of trees. It so works out that it will cover the ground not letting grass grow, it looks nice, and it gets it out of the fields re-purposing it. This type of stuff makes me happy!


And now we are getting our serious garden game face on. We have planted one of the 6000 square foot of gardening we are doing this season. We plowed out 4 paddocks (each 1500 sq. ft.) and have gotten one of them finished around all the rain we have been getting. Yesterday it didn't rain, and if it stays dry and hot today, I will be able to get the other three areas prepped and ready for the family to "plant out" the rest of our ambitious planting plan. The statement "jump in head first" seems appropriate for this season of life for us.